Creating Music in the Comfort of Your Home

This article is about making music in the comfort of your home. It talks about how to build a studio, what equipment you need for recording, and how to do it on a budget. You can also learn more about different types of microphones and software programs that are helpful for editing audio files. This blog post will show you everything you need to know so that you can create high quality music without having to go into an expensive studio!

Download Helpful Software

There are a lot of different options that you can use to make music in the comfort of your home. It all depends on your budget and how much money you want to spend, but there is software available for everyone! The first thing that I recommend downloading is Audacity . This program allows you to record yourself playing an instrument or singing through a microphone by simply plugging it into your computer. It also allows you to edit the sound file so that you can make any changes or edits that are necessary.

Purchase Helpful Equipment

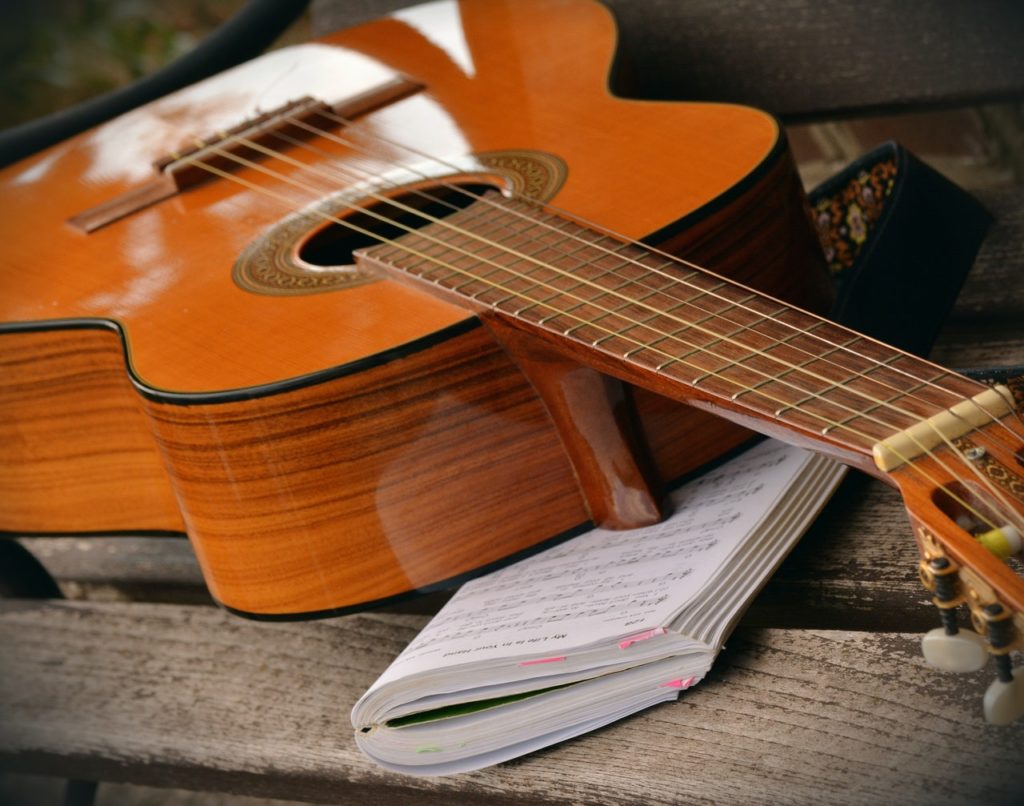
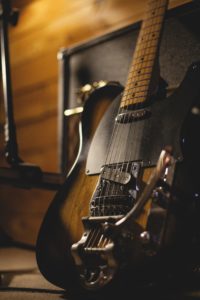
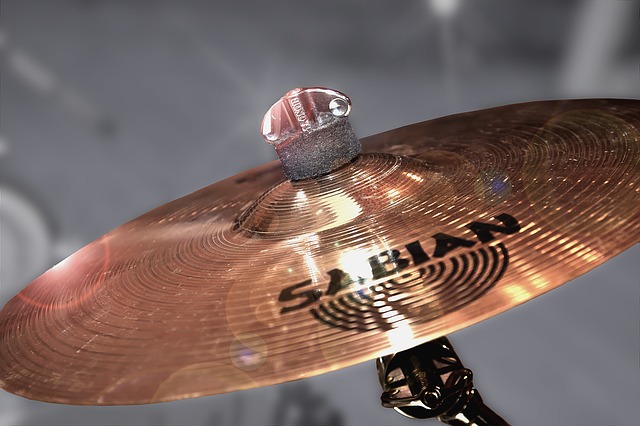
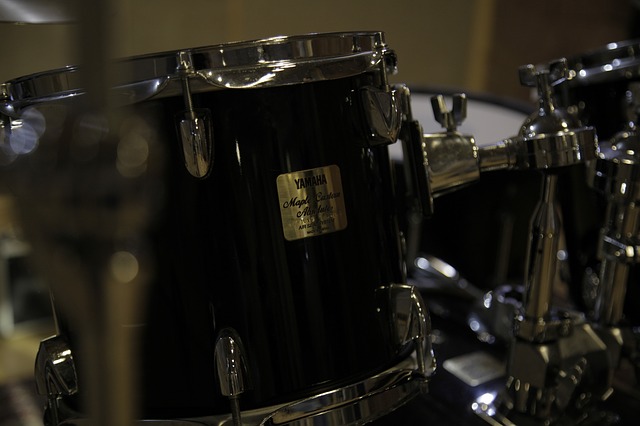
There is a lot of equipment out there that can be used for recording music in the comfort of your home, but here are some items I recommend:

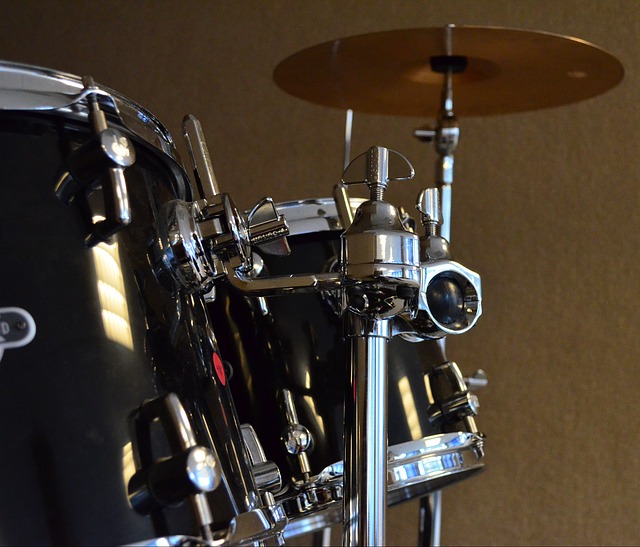
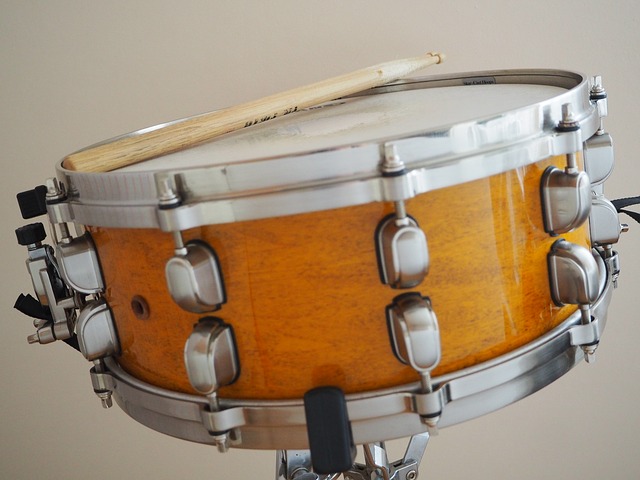
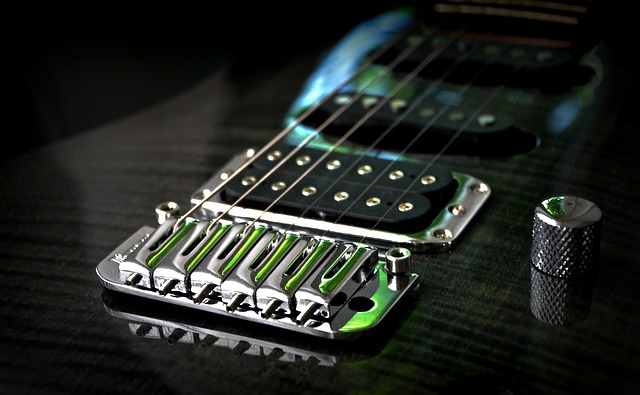
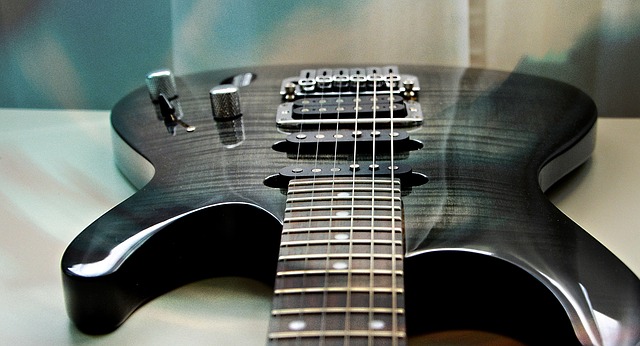
  • Condenser Microphone – This is a microphone that you can use to record vocals. It records the sound in such an accurate way, so it’s great for recording music! Condenser mics are more expensive than other types of microphones, but they’re definitely worth the cost.
  • Dynamic Microphones – These are going to be your most affordable option when it comes to microphones. They’re great for recording instruments, and they come in a variety of different price ranges.
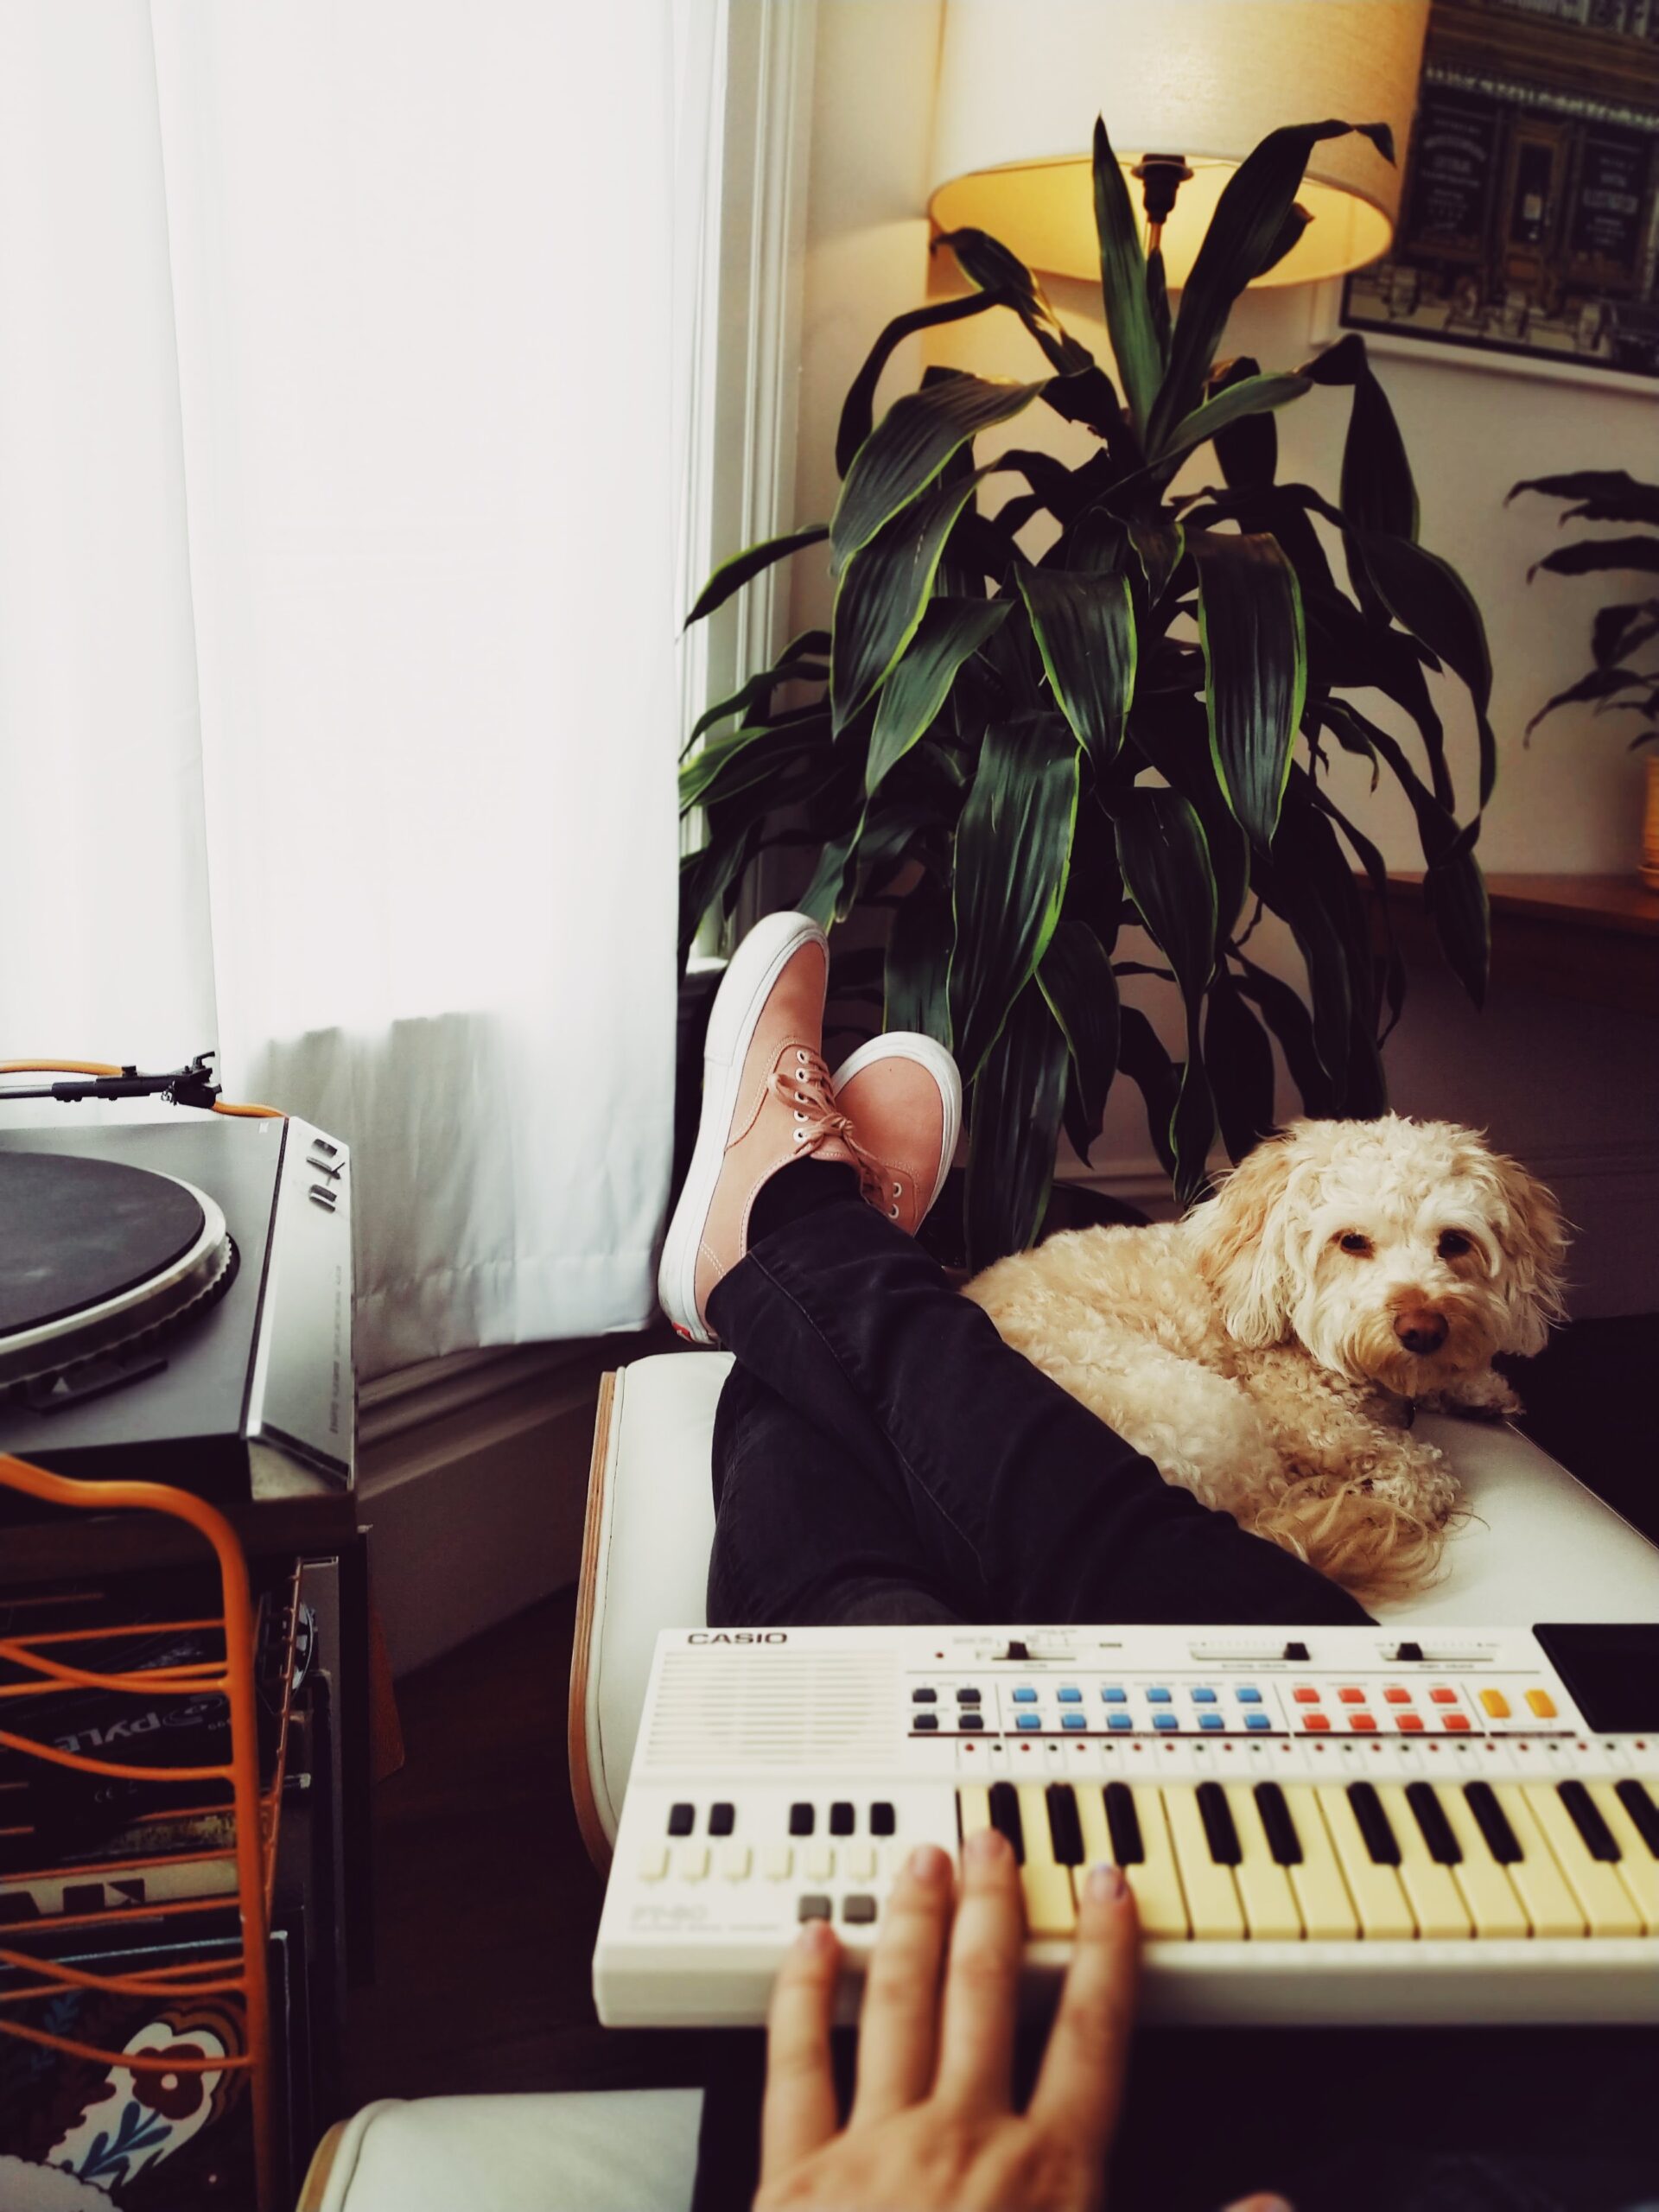
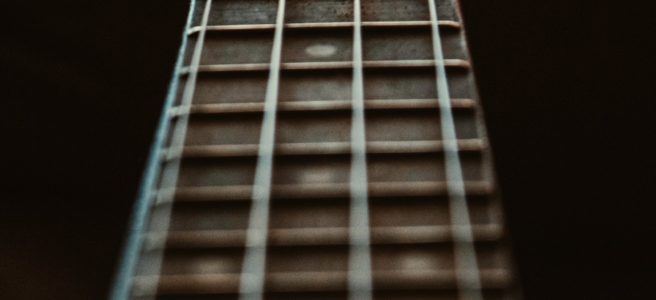
  • MIDI Keyboard – This is an electronic keyboard that can be used to record melodies and chords. It’s a great tool to have if you want to create your own music!
  • Audio Interface – This is an essential piece of equipment that is going to allow you to record and monitor your music. It’s the thing between your microphone, instrument, or MIDI keyboard and your computer.
  • Headphones – You’re not always going to be recording in a room where you can hear everything perfectly clear (especially if it’s noisy outside). That’s why I recommend getting good quality headphones.
  • Microphone Stand – You’re going to need a place for your microphone! These stands are easy to use and will help you record music in the comfort of your home.

There’s no limit as to what type of equipment you can use when it comes recording music, but I highly recommend checking out forums or websites that talk about home recording. You can find a lot of helpful information and recommendations from people who have already been in your shoes!

Build Your Own Recording Studio

If you’re looking to take your music production to the next level, you may want to consider building your own recording studio! This is definitely an investment, but it’s something that can be done if you’re willing to put in the work.

What To Do With Your Dog When Practicing Your Musical Instrument

You can’t refuse the cuteness of your dog while practicing a musical instrument. You are going to cuddle with it especially if you have been with it for a number of years. if it is highly trained, you can just tell it to sit and you won’t be bothered anymore. Of course, one great thing to do with your dog is letting it fall asleep. How about massaging its neck and legs until it falls asleep?

That is such a nice idea as it would feel extra comfortable and you won’t even notice it is there since dogs hardly snore. Another thing to do with it is to pat its head. Most dogs are so active that it won’t last long by your side. It will immediately go to another place when you pat its head and give it the attention that it craves.

When you can afford to pause for a bit, why not take it out for a short walk? Or maybe your home is equipped to let them run around in your yard without a leash. It is possible the dog needs to get out for a bit in order to pee and poop. That is also going to benefit you as you will get to exercise a bit. It won’t be long before you will feel excited about going back to practicing your instrument since you are motivated to do so.

Your dog must be coming near you while you are practicing your musical instrument because it is a bit hungry. Hence, you must give it a few treats. If it sits down and stays calm, you know it is doing the right thing. Give it some yummy treats as a form of reward so that it will remember to do it again in the future. Remember to touch its fur gently so it would feel comfortable by your side. The reason your dog is there is not to disturb you. The reason your dog is there is that it feels a bit boring. One way to fix that would be to buy some doggie toys. You can let the pet play with the toy until it finds another thing to do. You know dogs, small or big pups, love to play as they don’t like being bored. In fact, the dog may bark at you and you may get distracted. Hence, one thing you must never do is to scold it and make it go away. It will feel lonely and that is one thing you must never let happen to your dog.

It certainly is a different story when your dog barges in while you are in the middle of the practice session. Why not let your dog join the practice session? Everyone knows dogs make us pretty happy so you would not want to lock it in another room. The mere sight of your dog smiling would make us happy and we would want to kiss the cute animal. Also, giving a doggie massage is not the same as giving a human massage. Hence, better not give your dog any oil as your hands would do.

How To Find Your Perfect Guitar

Are you planning to buy a guitar? You could be a beginner buying your first one. You might also want to replace your old one. You may also want to start collecting or simply add to your collection of guitars. No matter what the reason, it always important to be smart and mindful about it. With a little bit of effort, you can find what is right for your needs. What are the things you need to consider for finding the perfect guitar?

1. Type of guitar

Guitars come in two major types that you can choose from: the acoustic and the electric. If you are a first-timer, it is advisable to choose an acoustic. Acoustic guitars do not require any accessories or equipment to use it which means you can start right away. They also have thicker strings, so it will be better for training your hands so that it will easy to transition into an electric after some time. But if, on the other hand, you are looking for something new and versatile, you may want to just go ahead and get the electric guitar.

2. Research

There many guitars to choose from. There are the popular brands such as Fender, Gibson, Les Paul, Ibanez, etc. It is good to conduct your own research before making your decision. It is also wise to ask a friend’s recommendation and advice about what they think is the best and also what they have tried. Reading reviews about a certain product and brand is also nice.

3. Budget

It is always important to know what your price range will be at the outset, whether it will be your first guitar or you are looking for something to add to your collection. Normally, a great guitar will be really pricey and if you are ready to invest in it, it is your choice. But if you are looking for your first guitar and do not want to spend too much, there are still decent guitars that are less expensive. 

4. Accessories

In playing guitar you will be developing your technique and style, so it would be a worthwhile consideration to invest in a few accessories. Electric guitars are more commonly associate with accessories, but acoustic guitars have them also. Here are some of the accessories to consider:

  1. Picks – These are essential accessories that help you strum and pluck. It is important to have the right material so it will not be easily broken and produce the sound you like.
  2. Stand – it is where you put your guitar for storage without the hassle of getting it into a bag every time.
  3. Strap – This is used so that you can attach the guitar to your body, so you will not be uncomfortable while playing, and they are almost essential when you are playing while standing up.
  4. Tuner – You’ll pretty much need this to tune your guitar easily and quickly. You can also get free apps that will do the job for you these days.
  5. String – strings are essential for a guitar, so it is a good idea to have a spare set on hand in case your strings suddenly break. It is also recommended to change strings when they begin to corrode or thin. Make sure to know the right strings for your guitar.

How To Keep Your Drum Set Shining Clean

A drum set is no ordinary piece of musical equipment. They consist of many components, each of which can be quite expensive in their own right. An entire kit can be quite a valuable instrument, and it’s important that it is taken care of over the years to make sure it will perform at a top level for years to come. As drummers we obsess about things such as cymbal and drum placement, tuning of the drum heads, and the thump of the kick drum. Did you ever stop to think of how important it is that you keep this beautiful set of components clean and shining? Not only will it make them last longer, but they’ll look more beautiful on stage and they’ll help your drums retain their value should you ever try and sell them. Here are some things to keep in mind when you are cleaning your drum set.

The Stands

The stands are usually made of nickel-plated metal and as such they can take a lot of abuse. From being thrown around in the back of a gig rig, to dropped in the dirt during transport by the road team, they really can see it all. At least once a year, it is recommended to give the stands a good and thorough clean. When the weather is right, take them outside and give them a good hose-down. If you have a pressure washer, this is a perfect place to use it. Even a smaller electric pressure washer has plenty of strength to get the grit out, and if you don’t already have one you can learn more about them here.

Once you’ve thoroughly cleaned the stands its important to get them very dry to prevent oxidation and corrosion. It’s a good idea to oil the moving parts (clamps, joints, etc.). A lithium based grease can be a great product to use for this purpose. To really make them shine, finish the process off with a nice metal polish such as Mother’s Mag. This will put a nice finish on the stands.

The Drum Barrels

You’ll want to take your drum kit apart and clean the drum barrels a bit more frequently, perhaps on a quarterly basis. This is one of the most beautiful parts of the drums, often patterned with intricate woodwork or similar patterns.

You’ll want to make sure to get rid of all of the dust. A basic wipe down will get most of it, but unfortunately the devil’s in the details here. You’ll also want to make sure you get all of those hard to reach places like around the screws and mount holes, near the drum head, etc. Q-tips can be your best friend for this exercise.

Once you’ve removed all the dust once again it can be a good idea to apply polish. Make sure to find something that is compatible with the material your drums are made of. A nice wood polish can go well with wood drums, but composite might call for something different. Check with the manufacturer to see what they recommend for your particular drums.

The Cymbals

The cymbals are not only the shiniest part of the drum kit, but they’re also the closest to your audience and they are placed the highest up in the kit. This means they are quite prominent and are sure to capture attention – that is, unless they’re DULL AF.

To keep your cymbals shining for days to come, a light scrub with soap and water will be sure to do the trick. You don’t want to scrub too hard because you can remove protective coatings and open up the metal to further corrosion. It is important however to get the dirt and grime out of the pits. As with the stands, make sure to dry them down thoroughly once you are finished, and apply a compatible oil to protect the cymbals and keep them vibrant for the days to come.

Drum kits are incredibly technical instruments, but they’re also works of art. Make sure they don’t fall into a state of neglect. If you keep on top of these three tasks, you’ll be sure to have beautiful drums that will last a lifetime.

How To Choose Your Next Drum Set

Buying a new drum set is a little different than buying most instruments. It’s not just that you’ll need a van to drag the whole thing home; you’re making an investment that’s not going to be put away in a closet or shoved in a garage in the next few years. You’ve got to live with your drum set, so it’s important to follow the tips listed below before you make a purchase.

Look at Your Budget

Your journey towards a new drum kit should always start with cold, hard cash. Try to come up with a workable budget that has very definitive ceiling before you even start looking. If this is your first drum set, take the time to educate yourself about the average price of a kit. If you’ve got a set already, try to factor in the money you’ll make by selling your current drums into your budget. If you’ve got a strong enough budget, you should be able to eliminate some of the kits that are realistically outside of your range.

Think About Utility

Why are you getting a new drum set? Are you just looking to replace something that was stolen or damaged? Are you looking to finally upgrade to something that’s worthy of being on stage? Are you just looking for a set on which you can learn? There are different drum sets for different types of drummers, so don’t get sucked into the idea that only one particular set will do. Find the kit that actually meets your needs so that you won’t have to go shopping again any time soon.

Do Some Triage

How much of your current kit really needs to go? While it’s great to have a totally matching set, buying a new set piecemeal might be better for your budget. Take a look at your snare, your hi-hat and your cymbals before you go out and start shopping – if any of them are in good condition, you might actually be better off replacing individual pieces of your kit instead of buying an entirely new drum set. If you need to replace more than one or two pieces, though, you’ll probably want to replace the entire thing.

Try Something New

Finally, be willing to throw caution to the wind if you can find a great deal. If you’re not looking for something that’s gig-ready, you’ve really got a ton of different alternatives out there. If you want something that’s a little more friendly for neighbors and roommates, for example, you might want to try an electronic kit. If you really care about how your drums look, you might want to go vintage. If you’re willing to ditch your preconceived notions of what makes a good drum kit, you might find something that’s a lot more fun to play.

Don’t get stuck on a single idea. Put together a budget, look at what you have, figure out what you need, and be willing to accept new ideas. If you can do all of that, you’ll be able to find a drum set that matches and exceeds your needs.

How To Pull Together A Makeshift Stage

We’ve all been there – sometimes one of your contacts wants you to play a show, and you have to work with the bare minimum of a venue. You don’t want to say no because it’s a paying gig, but at the same time you’ll need to scramble to get a stage together that will be comfortable for both you and your audience. Remember, presentation is half of the concert – if you can make it look great it will immediately support the idea that your band is great. Here’s a quick run down of a setup that will help you put on a wowing show with relatively minimal work.

What You’ll Need:

  • Firm and level ground, enough to fit you and your bandmates (preferably a driveway or patio)
  • Viewing area, enough to accommodate your audience (preferably something soft, such as lawn)
  • Speaker Stands and/or cinder blocks
  • Power supply
  • Bathroom access
  • Trash cans

Step 1: Claim Your Stage

The first thing that you need to get in order is the stage area. Ideally, you want to find a solid surface (patios are ideal) that will fit all of your gear and musicians. At a minimum you’ll need an area of 10’x10′, but you may need more for larger bands. The first thing you want to do is make sure that this surface is clean and appealing to the eyes. You’ll want to make sure that all of the dirt is washed away and any weeds, leaves, stains, etc. are removed.

You’ll want to make sure that your viewing area is comfortable for your audience. If it is lawn, make sure that it is properly mowed and manicured. You may also want to provide at least some form of seating for your audience, and maybe some surfaces where they can put beverages down. It’s little touches like these that can really lift the overall experience.

Step 2: Set Up Your Gear

Know what you’re getting into in terms of setting up your gear. Make sure that you will have access to sufficient electricity, and bring any extension chords and power sticks that you will need to have all of your equipment plugged in. You’ll want to set this up in a way such that it is not being constantly walked over by your audience, and also so that it will not be in any danger in case of rain or liquid spills.

In terms of setting up amplifiers, PAs, and monitors, it will be best if you can get them up off of the ground and properly directed. The best way to do this is with proper stands for your equipment, but in a bind you can use cinder blocks to get them up off the ground. This helps to make sure that your audience will have the best sound possible.

Step 3: Creature Comforts

In addition to any seating and tables mentioned in Step 2, there are a few essentials that need to be in order. First and foremost is access to bathrooms. You have to make sure that bathrooms are nearby, but you also have to make sure that they are CLEAN. Moreover, you should have someone on staff to make sure that they remain clean throughout the performance. Nothing grosses people out than a dirty bathroom.

Finally, you want to keep the venue looking as clean as when it was left to you. The first measure in doing so is having plenty of trashcans properly positioned throughout. This will encourage people to use them and make you job after the show a whole lot easier.

If you keep these simple three steps in mind, you can be sure that you’re on your way to a much more successful make shift show. Stay tuned for more fun!

Biweekly Shows at Cleary’s

Abandon All Ships is excited to announce that we have made an agreement with play regular shows at Cleary’s bar and grill now through December (Thanksgiving is off of course, and we’ll be wrapping up before the holidays). On the first and third Thursdays of every month, we will be hitting the stage at 9pm for an hour of jams to help keep the energy pumping throughout the evening. The staff at Cleary’s is great, as many of you know we’ve been working with them for years, and now they are stepping up their game. They’ve been working hard to revamp the place and make it more accommodating to bands like us to play, hopefully it will become the next local hotspot!

They’ve been kind enough to ask for our input in what it will take to make an excellent place for people to see a show. They’re purchasing a brand new fully functional sound system that should be absolutely excellent once installed, and a full set of lighting equipment to help bring the performances alive. We’ll still be using our own gear in the mean time, but once its up and running it will blow the doors off our stuff. They’ve even built a generously-sized raised stage so that the bands can spread out and really let loose. Right next to that they’ve made a satellite bar so that you don’t even have to leave the stage area to get a drink.

They’ve also renovated the lounge area, complete with televisions and a sound system so you can casually enjoy the show while kicking back on the couches with your friends or playing bar games. They’ve even installed a very realistic electric fireplace to help ease the tension and suit the relaxed mood of the lounge area. It’s surprisingly authentic. The place really looks great, and we can’t thank them enough for taking the time to deck the whole place out. Show them some support and come out next Thursday for some jams and some drinks.

As usual, we’ll be playing some of our classics with a mix of some recent covers to keep the party bumpin’. We have a few new songs that we’re looking forward to trying out with you guys, we’re very excited to see what you think. Put on your party hats and get ready for a full-tilt Thursday, we’ll help you make sure you start your weekend right. We’ll be hanging around after the show too so feel free to stick around and say hello.

As always, shows are 21+ with a  valid ID required for entrance. Don’t be that guy who gets stuck at the door. Entry is $25, and includes one free drink from the bar. Tell your friends and bring them along!

Heavy Metal – Tweaking Your Guitar for Maximum Crunch

There comes a time when every guitarist just wants to get up on stage and shred. Idols like Axel Rose, Zakk Wylde, and James Hatfield have inspired many of generations of guitar players, and will likely continue to do so for the coming decades. But how does one achieve that monstrous, nasty metal sound? It goes without saying that you will need to be well versed in power chords and familiarity with the pentatonic scale is about all you know to shred with the best of them. Learning your way around a guitar with dropped D tuning can help make your playing a lot more dark and powerful. It doesn’t take a genius to figure out that having a warm and powerful guitar amp can make a huge difference, and of course you will be leaning heavily on effect pedals such as distortion and overdrive. However, something that is often overlooked is the setup of the guitar itself. Among the most important guitar components for that heavy metal sound resides in the guitar pickups.

Humbuckers vs. Single Coil

Generally speaking, the best guitar pickups for metal are going to be active humbuckers. There are a ton of options available on the market today, and each can impart a unique tone and character. It’s important to find the set of pickups that will best suit your playing style – some emphasize noise and driven harmonics while others have massive amounts of sustain that will keep you shredding for days. The importance of using humbuckers however cannot be overstated. Whereas single coil pickups commonly found on Fender Stratocasters will impart a twangy (though delightful) aura on your sound a la Eric Clapton, humbuckers will give you warmth and thickness that originally embellished the power of blues music. This really has to do with the way that they are wired and there is some electrical engineering involved which we will not get into here, but suffice to say that if you are looking for a thick and crunchy metal sound then humbuckers are the way to go as opposed to single coil pickups.

Active vs. Passive

The second component of the guitar pickups that is important to pay attention to is whether they are actively or passively powered. The easiest way to identify this is by whether or not your guitar is equipped with a 9v battery. Have you ever noticed that many bass guitars require a battery to work properly, yet the majority of six string guitars do not? This is because bass guitars really need the active pickups to capture the fullness of the bottom end. The same thing happens in a six string electric guitar when active pickups are installed. In addition to capturing more of that thick bottom end, active guitar pickups will impart far more harmonic distortion than you will achieve with passive guitar pickups, resulting in a much richer tone once overdrive and distortion are applied.

Recap: Burning Man 2017

What a week that was! It was one hell of a trip getting there, but once we were in it was an incredible experience. We had so much fun, made so many new friends, heard and made tons of good music, and generally let loose in a way that we never have before. We saw some of the most outlandish forms of art – most of which was quite impressive. It was definitely a unique event, and we would highly recommend it if you’ve never been.During the day there are vibrant colors throughout, lots of people playing games, wandering, laughing, and generally enjoying life. This was when we were able to get in on some drum circles and get some deeply tribal grooves going. We met several other musicians who were happy to jump in and add to the energy. People around us loved it, and gathered around to dance. Their energy fed right back into the drum circle, and ours back to them. It was like a perpetual cycle.Of course, no festival is compete without a paint war. We had brought designated clothes just in case, and we were lucky we did! I’ve never been so covered in paint in my life – but hey, it’s always fun. Here’s a shot of Gordon after the fiasco:
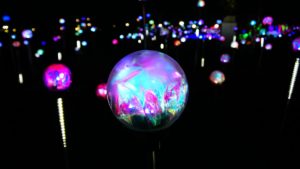
Of course, the whole event truly came alive at night. That is when some of the most outlandish and impressive art came out of the woodwork. We saw sculptures, massive structures, light gardens, the works. It’s hard to imagine that people were able to truck all of these things out into the middle of the desert. People are quite committed! Here’s a shot of an orb field that was particularly captivating:

All in all it was an absolutely lovely trip. That said, we’re happy to be heading back to the real world. You start to appreciate things like running water and electricity after roughing it in the desert for a week. A real shower is a true luxury. I’m not sure that we’ll ever make it back, it was quite an effort, but we are so glad to have experienced such a beautiful celebration of life. If you have the opportunity and the drive, don’t miss it next year!

Now it’s back to the drawing board for us. Stay tuned!

Burning Man Essentials

We’re very excited to be making the trip to the western United States for the epic Burning Man festival this year! We won’t be attending with the intentions of performing as a full-out band, but we’re still bringing along our basic acoustic instruments so we can jam out and have one hell of a time. It’s going to be an excruciatingly long drive, and once we’re out there of course resources become limited. Here are our top things to bring in case you’re planning to make the trip:

  1. Water – This is like clear gold out in the desert. Sure you can find more when you’re there, but prices will be adjusted according to supply – it’s best to plan ahead and go big.
  2. Sunscreen – Can’t stress this enough. With any luck, the sun will be STRONG. Make sure to protect your skin.
  3. Gasoline – Make sure your tank is plenty full for the weekend, we’ve heard horror stories of running out in the middle of the desert!
  4. Food – You’re obviously going to be hungry. If you are any good at cooking, it doesn’t hurt to bring enough food to share. It’s a great way to make friends and can even be used for bartering in a pinch.
  5. Lanterns – Don’t get lost in the dark! Also make sure that you have plenty of batteries on hand.
  6. Flag – This is a great way to mark your chosen residence. Bring a pole to get it nice and high so you can see it from far away!
  7. Clothes – Bring more than you think you’ll need, unless you don’t mind being drenched in sweat. Again, it can get really hot out there.
  8. Garbage bags (multiple colors) – You don’t want to be that campsite that makes a huge mess. We’re planning on bringing several colors so we can separate garbage and recycling.
  9. Rain gear – Don’t forget that the weather could turn foul, make sure to be prepared!
  10. Smiles – This place is all about fun, so bring only best attitude and open mind. We’re ready for a great time!

That’s all for today – we’ll be hitting the road shortly. We can’t wait to see everyone there!